Showing posts with label rolling. Show all posts

Saturday, July 7, 2012

PC Conversion Update - 7/7/12

      We officially have three weeks in the books. Only five weeks more until the Players Club re-opens. This past week we had excellent weather and were able to accomplish all of our goals. The greens are moving along nicely and we are confident that they will be in excellent condition on August 13th. Here is a rundown of last week and a look ahead to next..

Last Week 7/1-7/7
  • Monday - rolled and fertilized the greens. We fertilized with a starter (7-23-19) fertilizer and high nitrogen (21-0-0) fertilizer. This application will encourage new vertical growth. The new growth will provide the leaf tissue necessary to produce carbohydrates. The stored carbohydrates will help to produce new plants and encourage the surfaces to fill in.
Associate Juan Diaz Garcia
Associate Paul Stephens


    • Tuesday - applied growth regulator to the entire course. This will slow growth, resulting in less scalping from mowers and improved water efficiency.
    • Wednesday - we sent our staff to assist the Members Club for their triple tee preparation. The PC managers stayed and watered throughout the day. Here are a few snapshots of the surfaces on July 4th.


          You can see in the photos that the green is beginning to cover. On Monday, we decided that we would mow on Thursday. The appearance of the greens on the 4th reassured us that they were ready.

    • Thursday - This was probably the busiest day of the week. We mowed the greens for the first time. The height of cut was (.200"). This cut was designed to "clean up" the surfaces. Here is a picture of the mowing.
    Associate Ricardo Hehua

          From the picture above you can see the difference that the cutting made. The mowed section is to the left of our associate and the uncut portion is to the right. You can see that the mower has removed the top layer of the new growth.
          On Thursday we were able to begin another long overdue project. Replacing the artificial turf on #6 ladies tee/drop area. This tee has deteriorated and become an eyesore for the last year. Here are some pics of the removal process.


          The last picture shows the tee on Thursday afternoon. We expect the new turf to arrive late next week. I will post more pictures through the week detailing this project.
    • Friday - We finished our topdressing application that we started on Thursday afternoon. We applied a light to medium amount of sand/peat mix to the surfaces. The turf is growing at an uneven rate. The topdressing helps to maintain the smoothness through this transition. Here is a picture of #10 green after topdressing.


    Next Week 7/8-7/15
    • Mow the greens two to three times next week.
    • Topdress greens. We will be applying another light-medium layer of sand/peat.
    • Fertilize greens with calcium nitrate (15-0-0). The calcium is necessary for a few reasons, but one in particular. The reclaimed water that we use for irrigation has a slightly high ratio of sodium. Since we are watering aggressively, we need to take preventative measures to avoid a calcium deficiency.
    • Apply insecticide to the entire golf course. This application targets mole crickets, grub worms and ants. This application will be made on Wednesday, July 11th.
    • Finish #6 ladies tee.

          With only 36 days until re-opening, we are beginning to see the greens come to life. We will continue to water regularly through next week. The greens have matured to the point that we can increase the amount of water and decrease the frequency of application. I say this to remind you that we are watering the greens regularly. If you choose to stop by and see the greens, do so between 8-10 A.M. and 1-3 P.M. And of course, continue to follow the blog for more updates from the maintenance staff at St. James.


        Wednesday, June 27, 2012

        PC Conversion Update - 6/27

              The day has finally come and gone. The sprigs arrived around 12:00 on Monday. They came in a refrigerated tractor-trailer. After a short training session, we began planting around 1:00. We were able to complete the back nine (w/pg) around 6:30 Monday evening. We started the front nine at 7:00 Tuesday and finished up on the nursery green at 2:00. Here are some pictures and descriptions of exactly what transpired over the last two days.

              Prior to planting we applied two fertilizers and a pre-emergent herbicide to the greens. The fertilizers were applied to be readily available for the sprigs upon planting. We used a (46-0-0) and  (7-23-19) fertilizer for this application. These fertilizers were selected based on a variety of factors associated with our specific site. The pre-m herbicide was for control of crabgrass and goosegrass. Oxidiazon is the common name of the product we used. This product is the only pre-m that will not interfere with the establishment of new turf.

              Below are pictures describing the various stages of the sprig planting process. The first picture shows a full bag of sprigs as they arrived. These bags are placed all over the surface of the green. We used 15-20 bags per green.


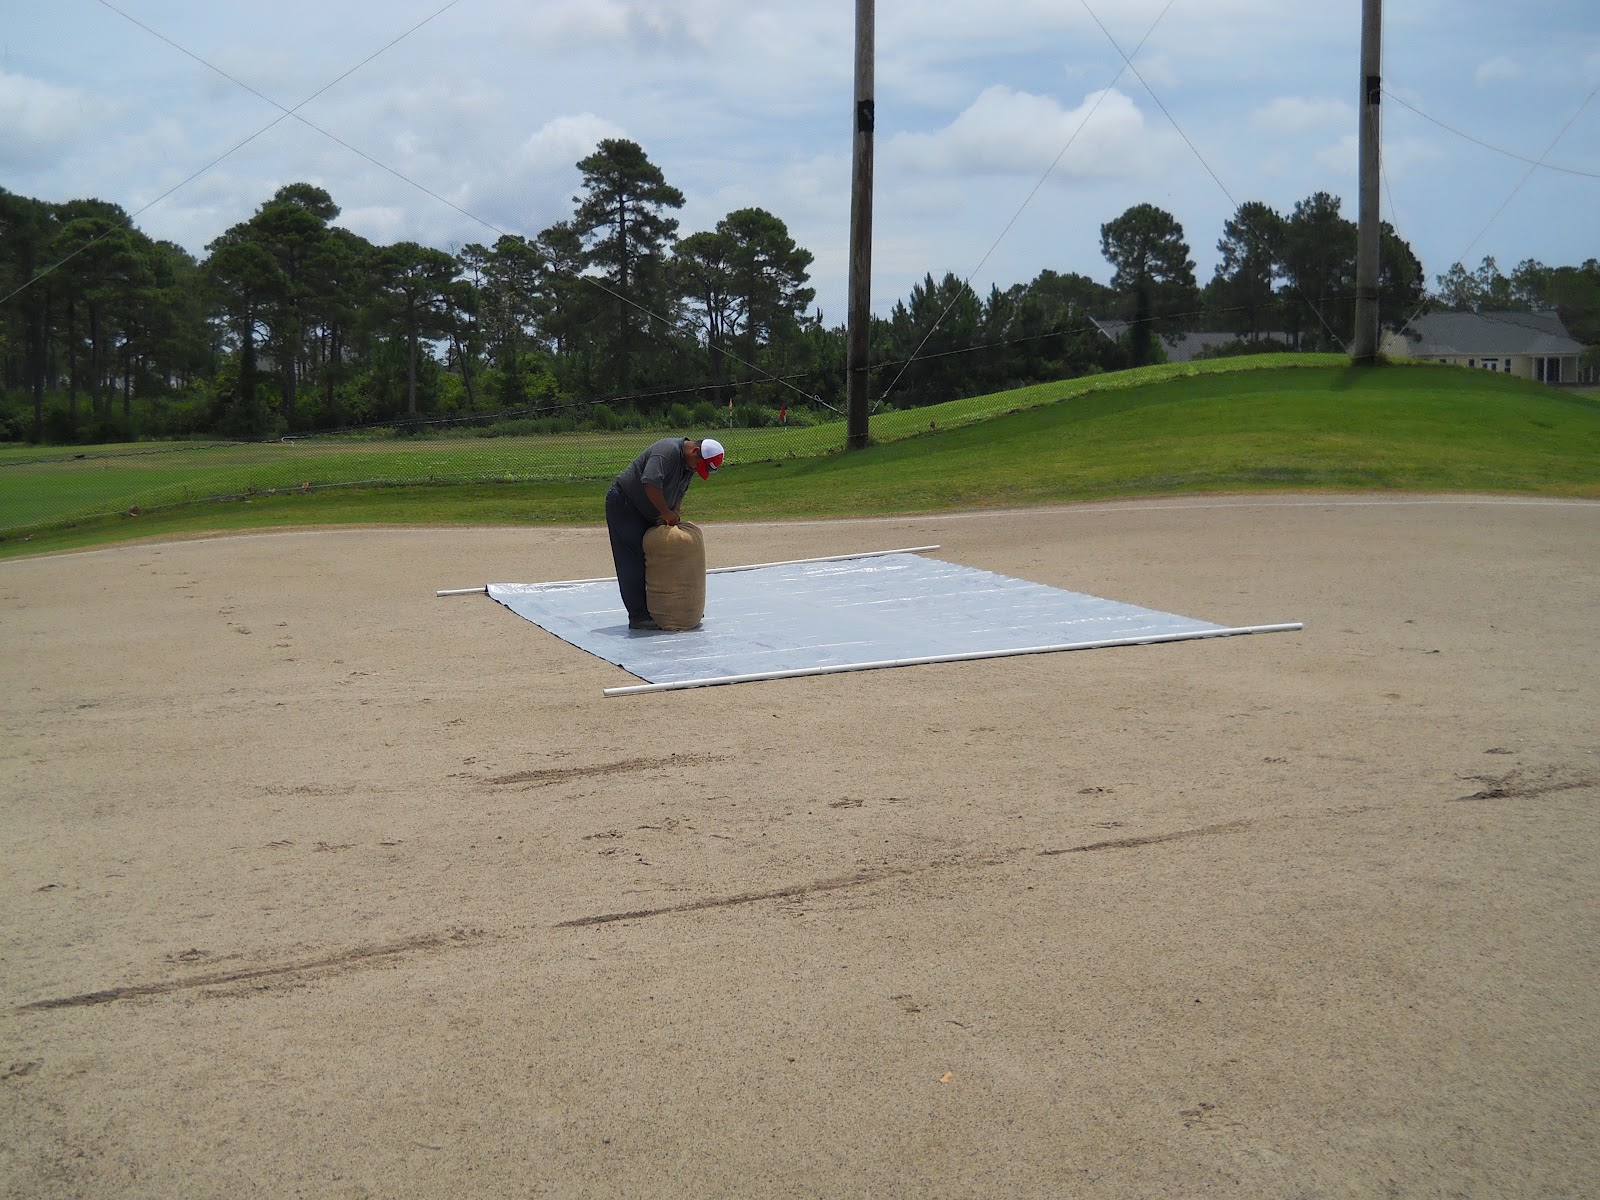
             The bags were then placed onto tarps for opening. The tarp prevented foot and hand marks in the surface from grabbing the sprigs. 


         Here is an opened bag dumped atop the tarp. The sprigs were compacted tightly in the burlap sacks, therefore we had to spread the bag over the tarp in order to seperate the sprigs.


          This photo shows the laying of the sprigs. It is just as it sounds. We would grab handfuls of sprigs a shake them out all over the surface. This process was similar to spreading bales of straw. 


        Below you can see the green take shape. We had roughly 10-15 people per green spreading the sprigs. Each green took approximately 30-40 minutes to spread.


        Near completion we began to apply water to the sprigs. This helped to keep the sprigs in place until we could apply water with the overhead irrigation. Below you can see a green in the final stage of sprig laying.


        The next step was to slice the sprigs into the surface. We sliced the sprigs in two directions. This process helps to promote good soil to sprig contact. The slicing also helps to keep the sprigs intact on the surface. This theory was tested and proven Monday night. We received two inches of rain and had zero displacement of sprigs.


        After slicing, we topdressed the greens. We applied a heavy layer of sand & peat on top of the sprigs. The topdressing provided the sprigs with the proper soil medium to encourage growth. Below you can see a photo of the green being topdressed.


        Below is a photo of the topdressed surface. You can see how the sprigs and sand/peat mixture have become incorporated onto the soil surface. 


        The final stage in the sprig planting was to roll. The rolling helps in smoothing the surface and promoting soil to sprig contact. Below is a picture of our roller in action.


        And then finally, water. Watering, rolling and fertilizer will be our primary focus over the coming weeks. At this point the sprigs need to be treated like seeds. We will apply light amounts of water at frequent intervals to establish the sprigs. At that point we will begin to reduce the frequency of water application.


              After months of preparation and planning, the sprigs have finally been laid. Our focus now shifts to establishment and maintenance of the green surfaces. I encourage all to stop by and check on the new greens. And always, continue to follow the blog for updates on their progress. Also, follow along on Twitter @stjamesturf. 


        Friday, February 24, 2012

        Video illustrating the venting process at The Reserve Club